How to Make a Cranberry Sauce Glaze: Step‑by‑Step Guide
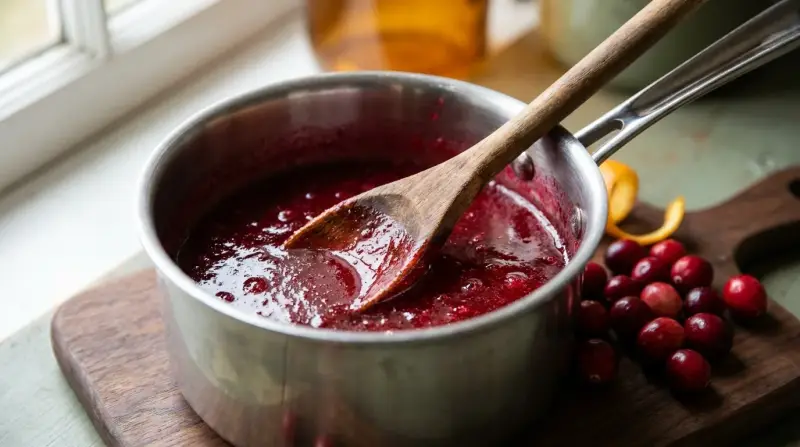
To make a cranberry sauce glaze, combine orange juice, brown sugar, and jellied cranberry sauce in a saucepan, bring the mixture to a gentle boil, then simmer until it thickens into a glossy, slightly thick coating that can be brushed onto roasted meat.
Ingredients
- 1 cup orange juice (freshly squeezed or bottled, no added sugar)
- 1 cup packed dark brown sugar
- 1 (16‑ounce) can jellied cranberry sauce
- 1 (3‑inch) cinnamon stick (optional for warm spice)
- Pinch of kosher salt
Equipment
- Medium‑sized saucepan with a heavy bottom
- Wooden spoon or silicone spatula
- Wire whisk (optional, helps break lumps)
- Instant‑read thermometer
- Pastry brush for applying the glaze
Step‑by‑Step Instructions
- Measure the orange juice and pour it into the saucepan. Heat over medium‑high until it begins to steam, about 1–2 minutes.
- Add the dark brown sugar and stir continuously until the crystals dissolve completely. The mixture will become amber and slightly frothy.
- Stir in the entire can of jellied cranberry sauce. Break up any large chunks with the spoon; the sauce will melt quickly.
- If using, drop the cinnamon stick into the pan and add a pinch of kosher salt to balance the sweetness.
- Increase the heat just enough to bring the mixture to a rolling boil. Once boiling, reduce the heat to a low simmer.
- Simmer, stirring every 30 seconds, for 8–12 minutes. The glaze will bubble and gradually thicken. Test the consistency by dipping the spoon: the coating should coat the back of the spoon and drip slowly.
If you prefer a thinner glaze for basting, remove it after 8 minutes; for a thicker, more caramelized finish, let it simmer the full 12 minutes. - Remove the pan from heat. Discard the cinnamon stick. Let the glaze sit for 2 minutes; it will continue to thicken as it cools.
- Using a pastry brush, apply the glaze to your roasted meat during the last 30–45 minutes of cooking. Brush, return to oven, and repeat every 10 minutes for a deep, glossy layer.
For a complete example, see the Cranberry Orange Glaze Turkey Breast: Roasted Festive Poultry recipe, which uses this glaze as its finishing touch.
Tips for Perfect Glaze
- Control the heat. A gentle simmer prevents scorching. If the bottom of the pan starts to darken, lower the heat immediately.
- Use a thermometer. Aim for a target temperature of 190°F (88°C). This ensures the sugar has reached the soft‑ball stage, giving a glossy finish without becoming candy‑hard.
- Adjust sweetness. If the glaze tastes overly sweet, stir in 1 teaspoon of apple cider vinegar or a splash of low‑sodium broth to add acidity.
- Strain for smoothness. For an ultra‑smooth surface, run the hot glaze through a fine‑mesh sieve before brushing.
- Storage. Refrigerate any leftover glaze in an airtight container for up to 5 days. Reheat gently on low heat before using again.
Troubleshooting
Glaze is too thin
What goes wrong: The simmer time was too short or the heat was too low, leaving excess liquid.
What it looks like: The glaze runs off the brush in a watery stream and fails to coat the meat.
What to do: Return the glaze to the saucepan, increase the heat to a gentle boil, and simmer an additional 3–5 minutes while stirring constantly. Test again with the spoon‑coat method.
Glaze becomes grainy or crystallizes
What goes wrong: Sugar crystals re‑form when the mixture cools too quickly or when the pan is overheated.
What it looks like: A gritty texture that feels like sand on the tongue.
What to do: Gently reheat the glaze, add a tablespoon of orange juice or water, and whisk vigorously. The added liquid helps dissolve any recrystallized sugar.
Glaze burns or sticks to the pan
What goes wrong: The heat was too high, or the pan lacked a heavy bottom, causing hot spots.
What it looks like: Dark brown or black specks at the bottom, a bitter taste, and a thick, caramelized mass.
What to do: Immediately remove the pan from heat, transfer the glaze to a clean saucepan, and finish simmering over low heat. Use a silicone spatula to scrape the burnt bits off the original pan for future use.
Frequently asked questions
Can I use fresh cranberries instead of jellied sauce?
Yes. Combine 12 oz fresh or frozen cranberries with 1 cup sugar, 1 cup water, and orange zest, then simmer until the berries burst and the mixture thickens. This yields a more textured glaze but requires a longer cooking time.
Is it safe to use the glaze on chicken that will be grilled?
Absolutely. Brush the glaze onto the chicken during the last 10 minutes of grilling, turning frequently to prevent burning. For extra flavor, read the article Barbecue Sauce on Chicken: Apply Before Baking or After? for timing tips.
Will the glaze work on pork‑free dishes?
Yes. The glaze pairs well with turkey, chicken, or beef. If you want a savory edge, add a teaspoon of Worcestershire sauce; see the discussion in Yes, You Can BBQ Chicken Thighs – Simple Steps for Juicy, Flavorful Results for balancing sweet and umami.
How long can I store the glaze before using it?
Store the cooled glaze in a sealed container in the refrigerator for up to 5 days. Reheat gently before applying; do not microwave at high power to avoid scorching.
Can I make the glaze ahead of time?
Prepare the glaze up to 24 hours in advance. Keep it refrigerated, then warm gently on the stove before the final brush. This allows the flavors to meld and makes the final coating more uniform.
A printable recipe card for "Cranberry Orange Glaze Turkey Breast: Roasted Festive Poultry" is just below the article, ready to download or print.
Printable recipe card: Cranberry Orange Glaze Turkey Breast: Roasted Festive Poultry
Save it, print it, or keep it on your phone while you cook.
Loading the recipe card…